GETTING STARTED

HOW A CERAMIC COOKER WORKS
Kamado-style cooking is extremely versatile and allows you to use such techniques as “hot and fast” with direct grilling, “low and slow” for smoking, as a “convection” oven for roasting or baking and even as a high-temperature pizza oven. Its airtight cooking chamber helps keep food moist as it cooks. In fact, the secret to achieving great results when cooking on a kamado centers on three things: heat retention, airflow and temperature control. For this reason, I recommend that you cook primarily with the lid closed. This will allow the heat to radiate inside the Big Green Egg (a.k.a. EGG) and keep moisture from escaping. Kamados are also extremely economical when it comes to fuel consumption. A single load of charcoal can last eighteen-plus hours, depending on what size cooker and lump charcoal you have, while holding a constant temperature.
The word kamado comes from a Japanese term that translates into “stove” or “cooking range.” It is a style of cooking that dates back over 3,000 years, which features a circular clay or ceramic vessel that uses wood and/or charcoal as its fuel to cook the food. Traditionally, clay pots were used in this style of cooking due to their heat retention properties and their ability to prevent food from losing excess moisture as it is cooked.
Since its invention, the kamado-style grill has come a long way. Producers of these modern ceramic cookers, such as the Big Green Egg, have taken advantage of advances in ceramic formulas, which have resulted in a much more durable product. Their thick ceramic walls retain heat and moisture to produce results far superior to metal grills and smokers.
OVERVIEW OF THE BIG GREEN EGG
Components
The Big Green Egg is available in seven different sizes, ranging from 2XL all the way down to Mini, and they are all set up in the same style. The egg shape of the cooker is designed to contain the heat by using two draft doors, one in the bottom of the base and another at the top in the dome.
Available Big Green Egg Sizes:
• 2XL 29-inch (74-cm) diameter for a total cooking area of 672 square inches
• XLarge 24-inch (61-cm) diameter for a total cooking area of 452 square inches
• Large 18.25-inch (46-cm) diameter for a total cooking area of 262 square inches
• Medium 15-inch (38-cm) diameter for a total cooking area of 177 square inches
• Small 13-inch (33-cm) diameter for a total cooking area of 133 square inches
• MiniMax 13-inch (33-cm) diameter for a total cooking area of 133 square inches
• Mini 10-inch (25-cm) diameter for a total cooking area of 79 square inches
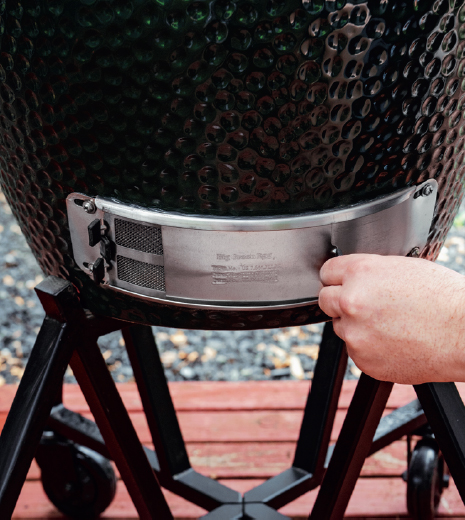
Base—Lower Draft Door
Gasket
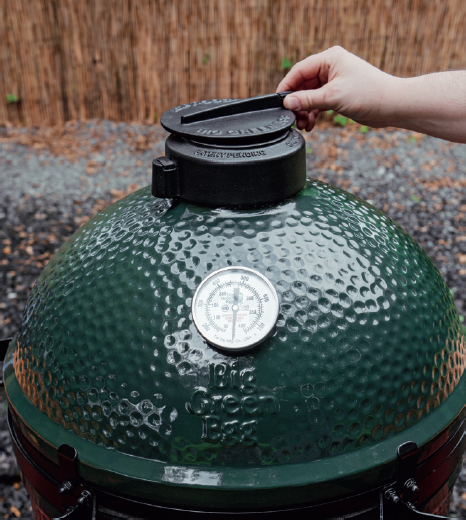
Temperature Gauge
Base—Lower Draft Door: There are two layers to the bottom draft door: the door itself and a mesh screen to keep ash and embers from falling out of the cooker. Be sure that the mesh screen is closed while running your EGG.
The bottom draft door slides horizontally to control air flow. Think of this draft door as being used for major temperature control of more than 10°F (5.5°C) at a time.
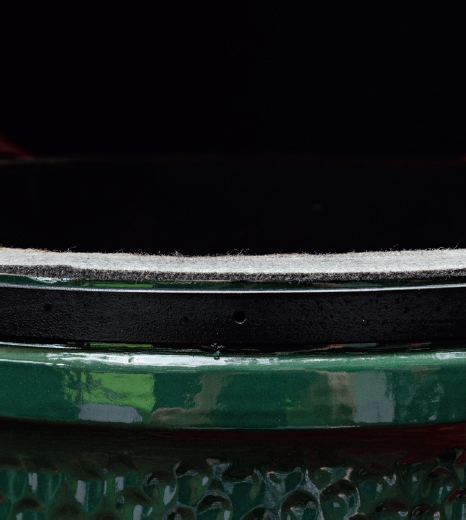
Gasket: The kamado felt gasket provides an airtight seal between the lid and the base when closed. This is important both for the moisture retention and to ensure that the air flow through the kamado operates as it should.
Dome—Upper Draft Door and Daisy Wheel: The upper draft door, or daisy wheel, swivels left and right, creating updraft, and in turn adjusting the temperature used in the cook.
The upper vent is more of a minor temperature control, which is used when you are trying to dial in a temperature less than 10°F (5.6°C). The upper vent setting consists of a cast-iron vent that has a dual function. The dual-variable daisy wheel allows for precise temperature control. If you are within a few degrees, you just need to adjust the top daisy wheel, and if you are within 5 to 10°F (2.8 to 5.6°C), you can adjust the lower daisy wheel. If you have a rEGGgulator cap, you can make one adjustment to dial in your temperature.
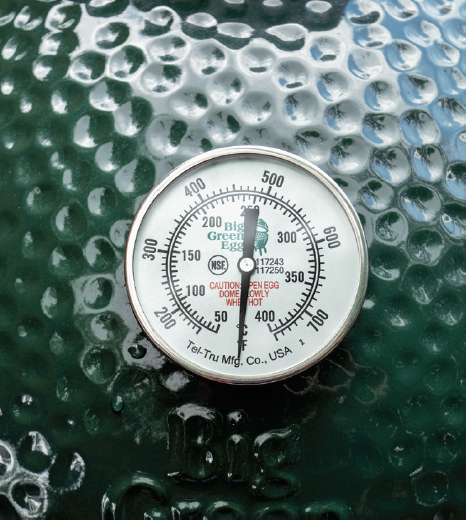
Temperature Gauge: Registers the temperature in the cook chamber at the top of the dome.
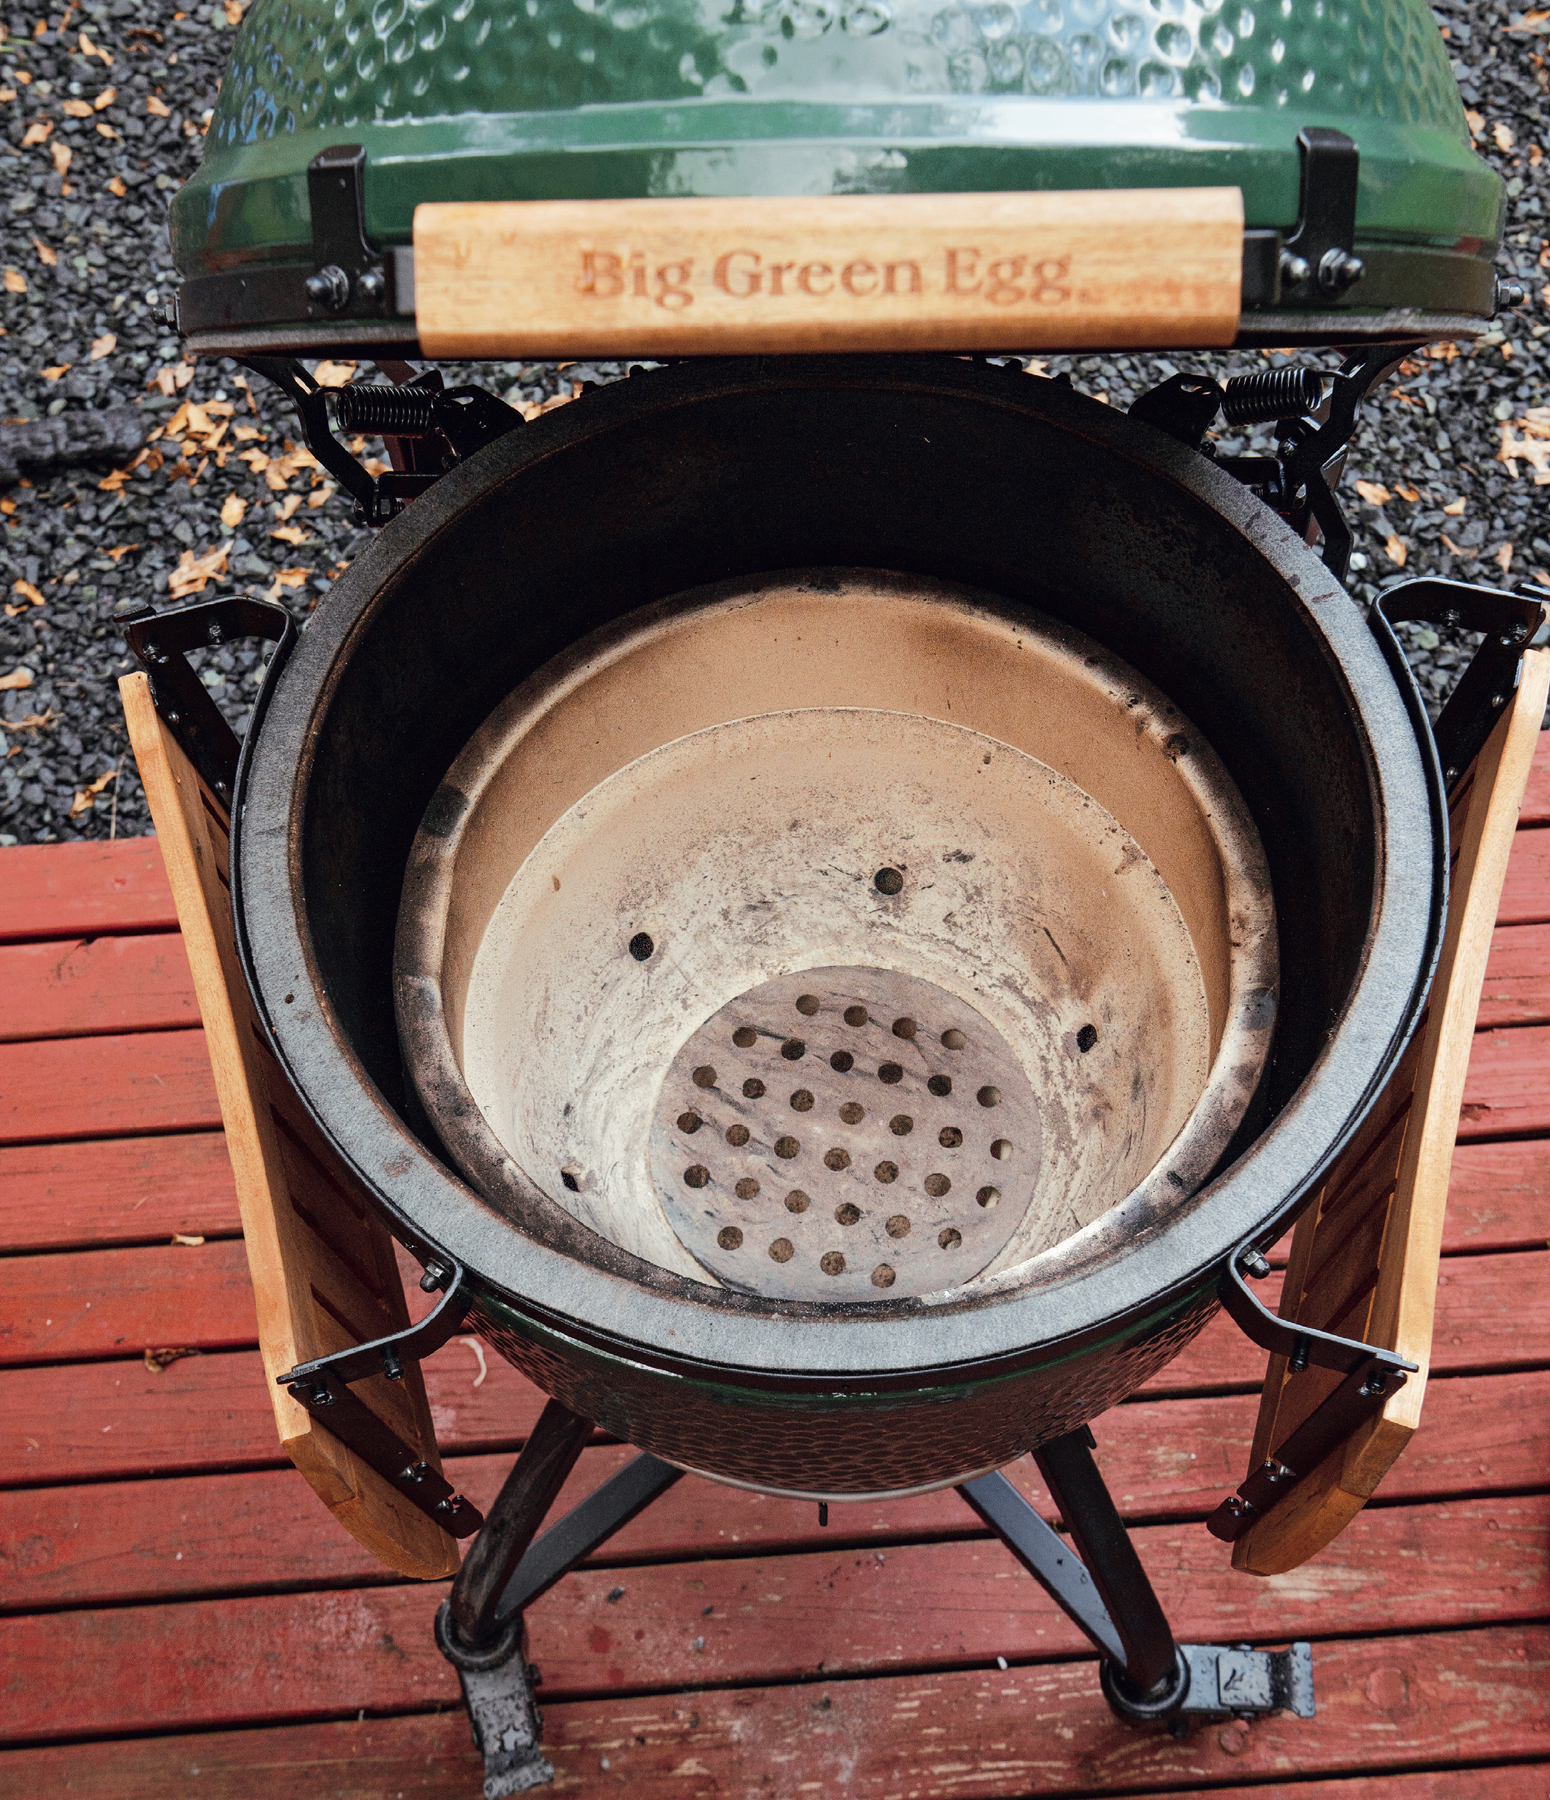
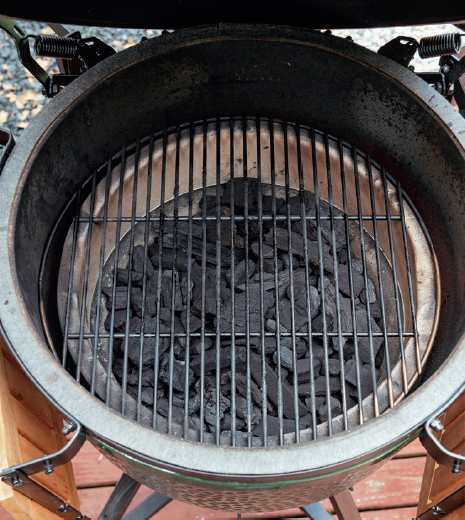
The Firebox: Holds your fuel and is constructed with a cutout that must line up with the bottom vent of the EGG to allow air to enter and feed the flame.
Fire Grate: The fire grate rests in the base of the fire box. It is a heavy, cast-iron part with holes that allow incoming air through to the fire.
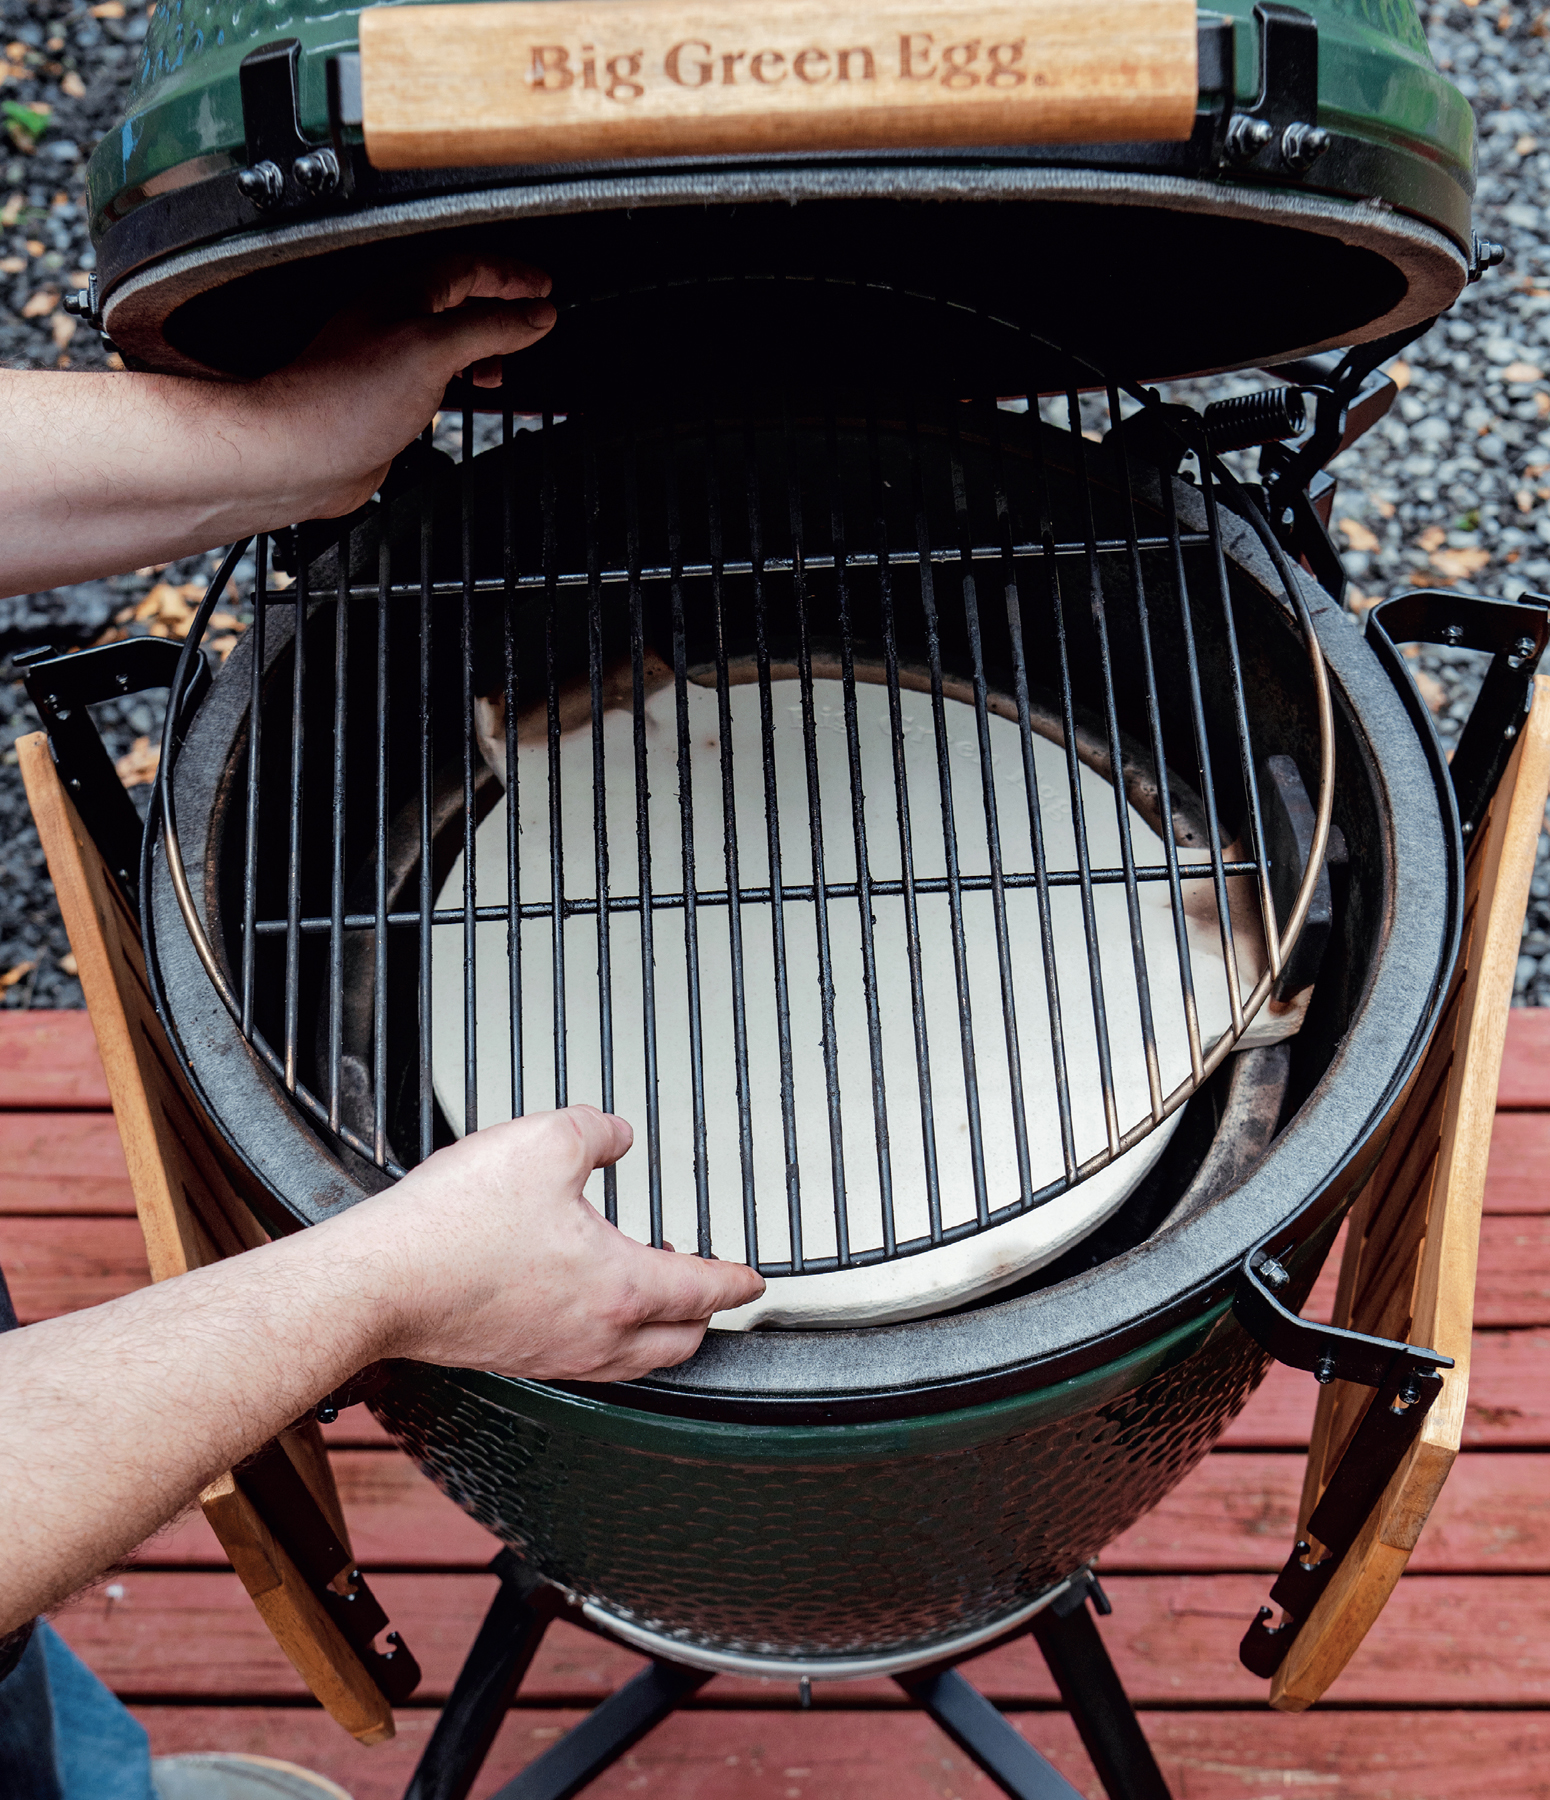
Fire Ring: The fire ring sits on top of the fire box. It creates the space for your charcoal to burn in. The fire ring and the fire box make up the lining of the EGG’s interior, where the fire gets the hottest. It also creates the surface for the heat diffuser and cooking grate to rest on.
Cooking Grid: The cooking grid is where you do the cooking. It sits atop the fire ring when using direct heat or atop the heat diffuser when cooking with an indirect heat setup.

Pizza Stone
REGGulator Cap
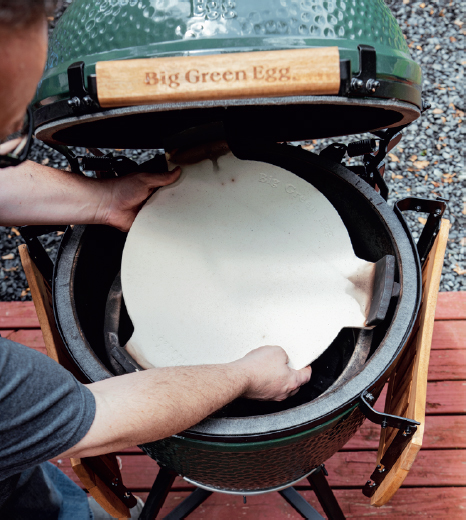
Plate Setter
Accessories
IntEGGrated Nest Handler and Acacia Hardwood Tables: Both of these will do a fine job of holding your EGG securely while you cook.
EGG Mates: These wooden side shelves are practical and have great eye appeal.
ConvEGGtor, a.k.a. the Plate Setter: This heat diffuser is the most important accessory for going low and slow on the EGG. It forms a barrier between the fire and the food you are cooking.
EGGspander: A multilevel rack that gives you the ability to cook more food at the same time.
Pizza Stone: A ceramic baking stone that distributes heat for even baking and browning.
Cast-Iron Plancha Griddle: Ideal for searing meats, cooking seafood, sautéing vegetables and grilling sandwiches and panini.
REGGulator Cap: Cast-iron vent cap that replaces the traditional dual-function metal top. Unlike its predecessor, the rEGGulator does not move upon opening the EGG once you have your temperature dialed in.
Automatic Draft System Control, such as EGG Genius or BBQ Guru DigiQ: If you are having trouble controlling your temperature, these draft systems can make your EGG a set-it-and-forget-it cooker.
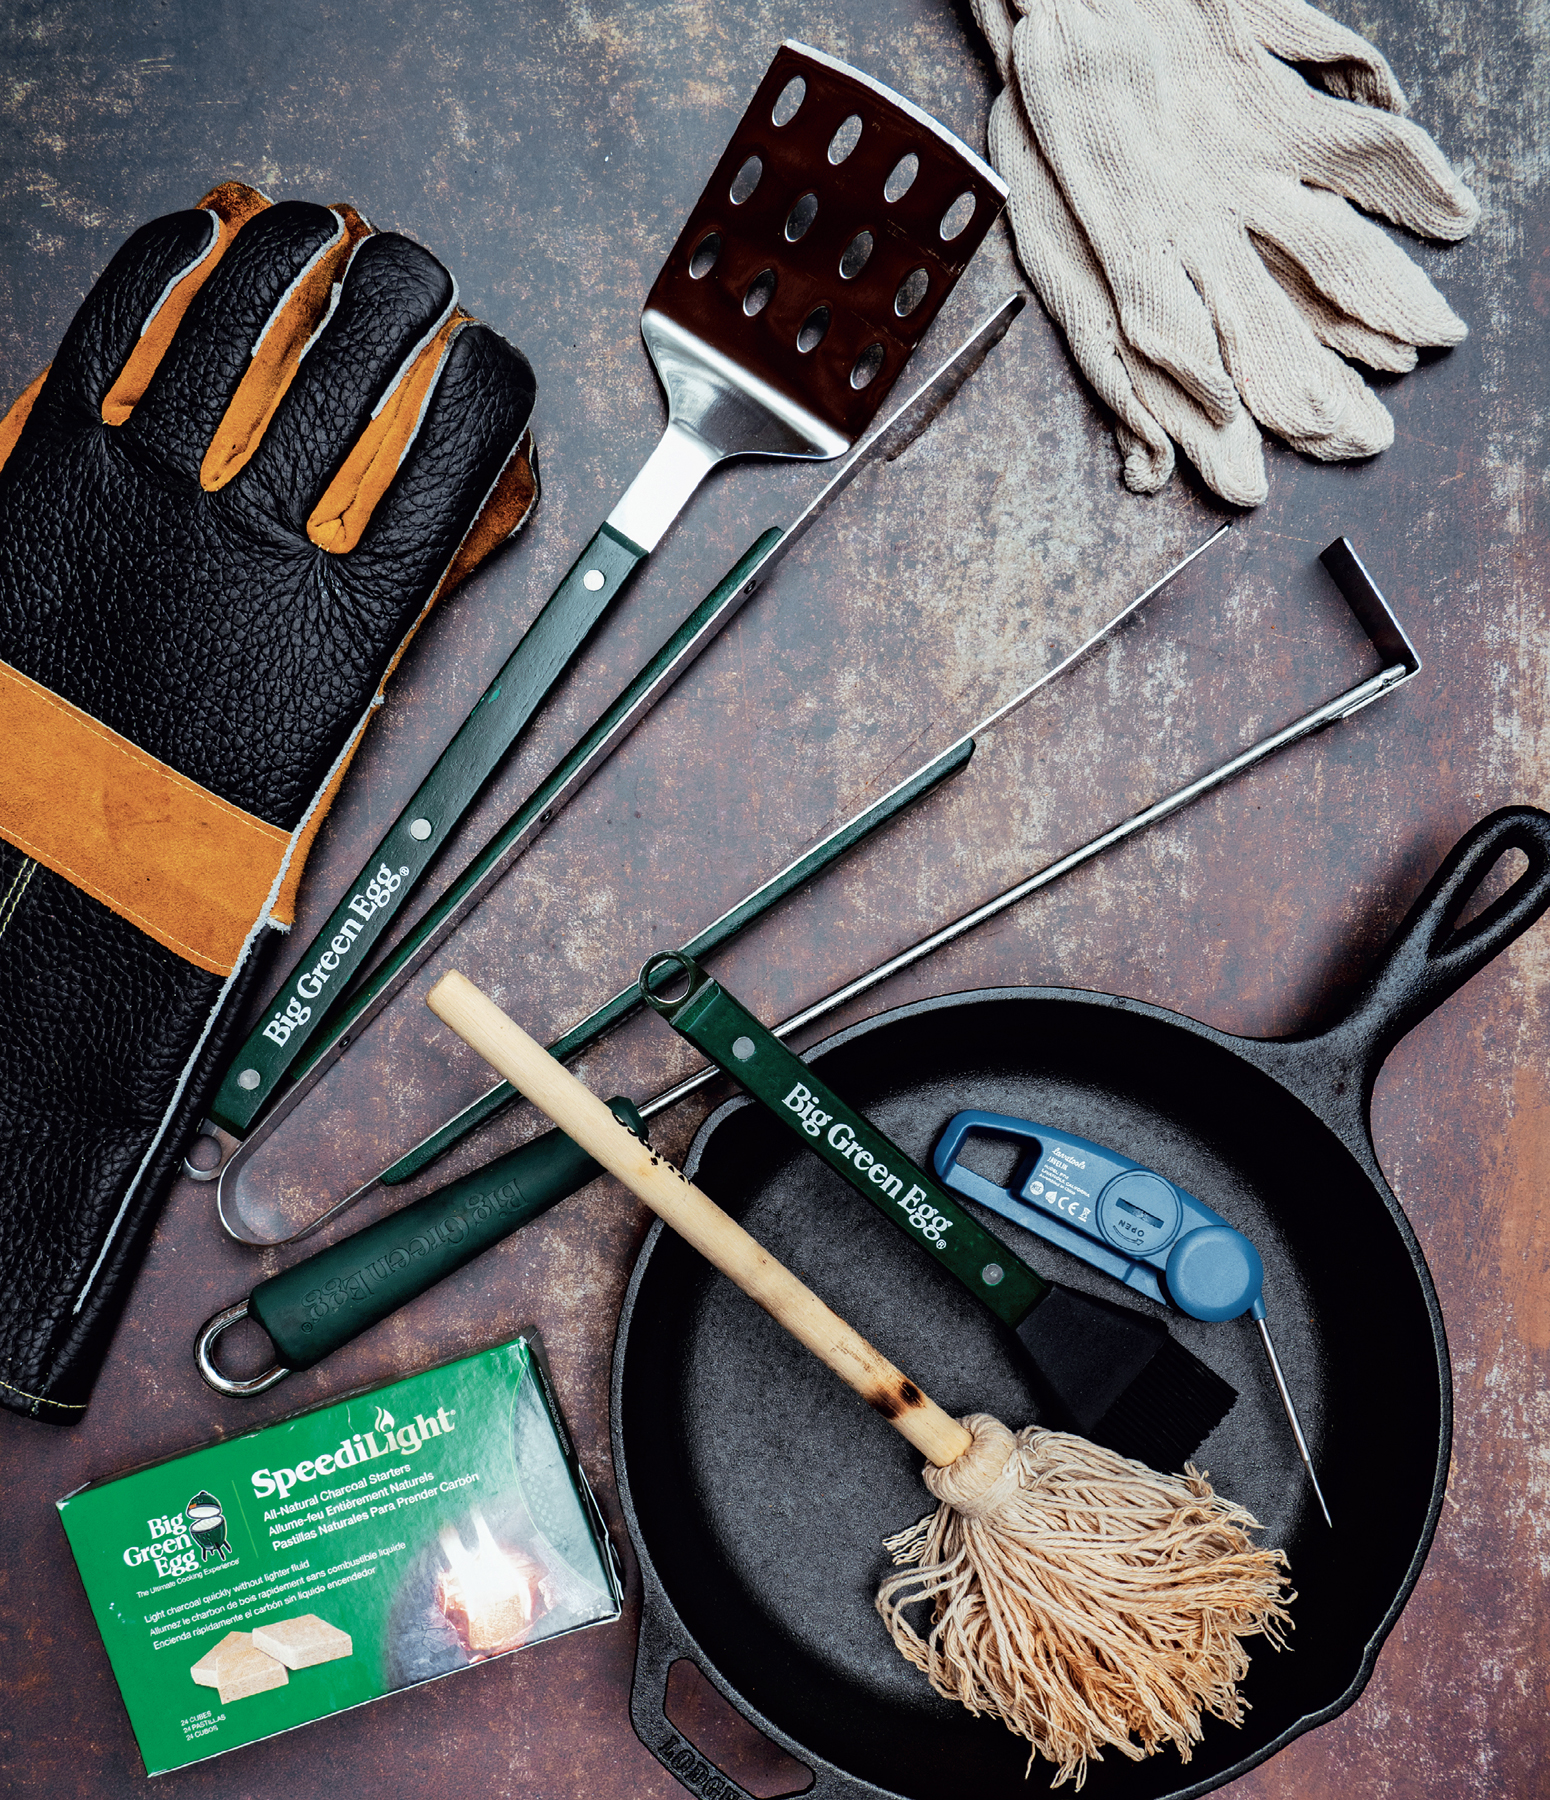
TOOLS I CAN’T LIVE WITHOUT
• Heat-resistant barbecue gloves
• Nitrile gloves with cotton glove liners
• Instant-read thermometer, such as a ThermoWorks
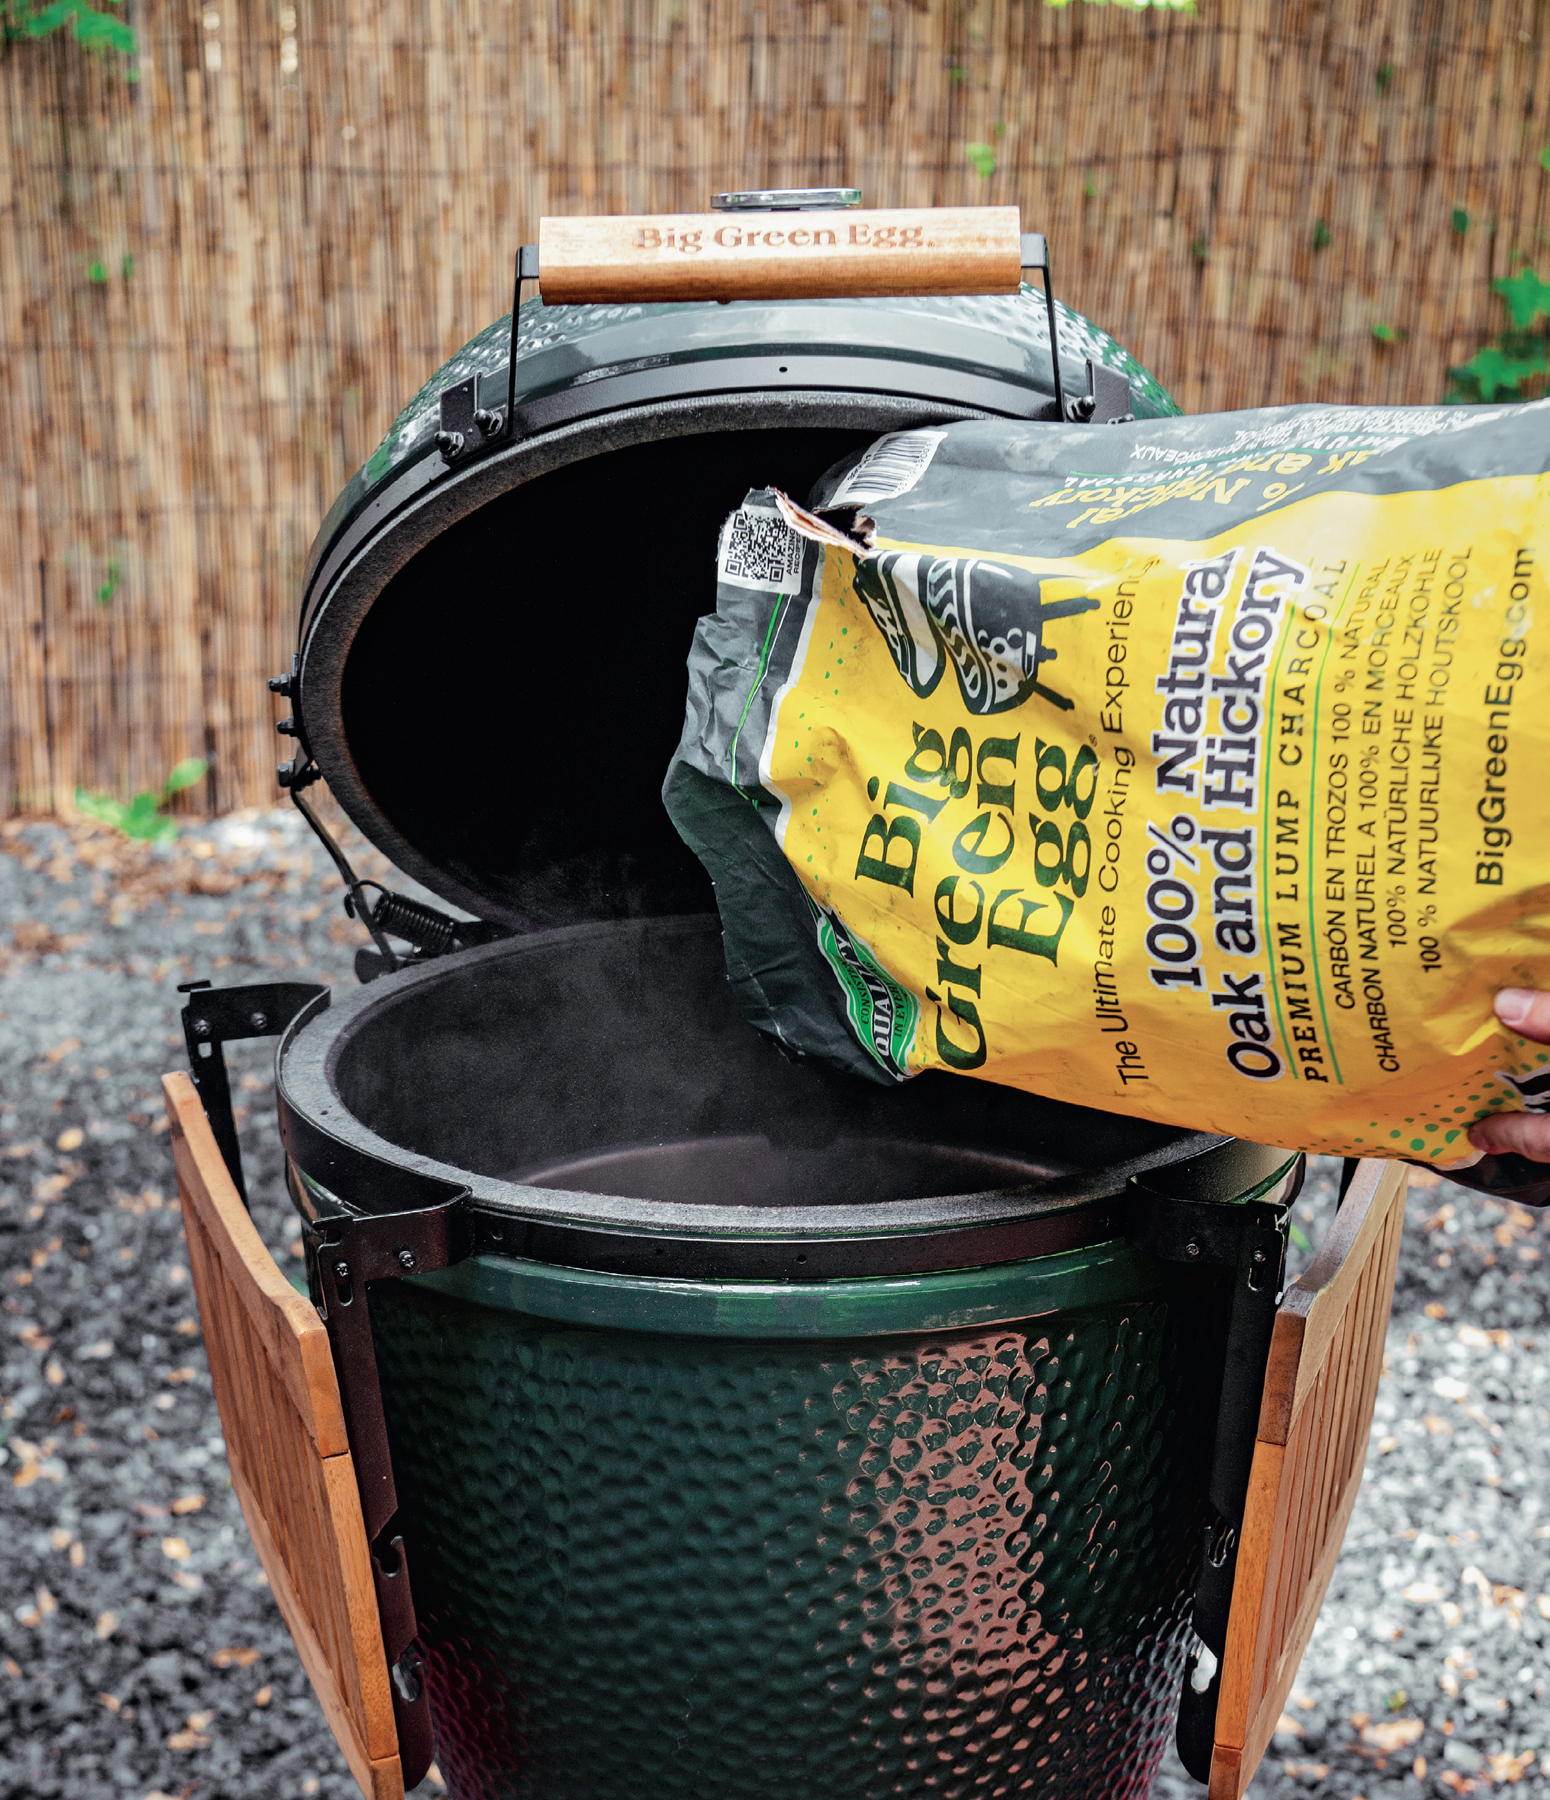
• Natural lump charcoal, such as Fogo, Jealous Devil or Big Green Egg brands
• Good sharp knives, such as Gunter Wilhelm brand
• Cast-iron cookware, such as Lodge brand
• Fire starters
• Ash tool
• Ash can
• Disposable cutting boards
• Grill brush
• Long-handled basting brush
• Metal spring-loaded tongs
• Spatula
• Lighter
Direct
Indirect with Drip Pan
Indirect without a Drip Pan
COMMON EGG SETUPS
Method: Direct
This is the most common setup and is used for direct cooking, searing and high-heat grilling. Load your firebox to the top with natural lump charcoal. Light it and replace the cooking grid.
Method: Indirect with a Drip Pan
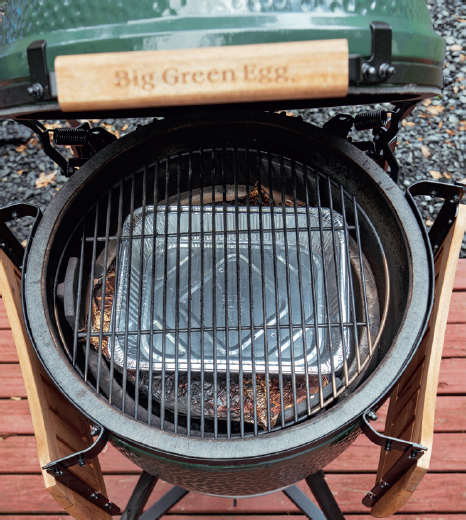
This method of indirect cooking is typically used for smoking or roasting. By adding a convEGGtor (heat diffuser), you now have a barrier between the direct heat and the food. The drip pan will catch any of the dripping fat and prevent it from burning on the heat diffuser. For this setup, fill the firebox to the top with natural lump charcoal, layering it with smoking wood chunks if you are using them. Light the charcoal, and once the fire is lit, put in the convEGGtor with the legs pointing up, top it with the drip pan and replace the cooking grid.
Method: Indirect without a Drip Pan
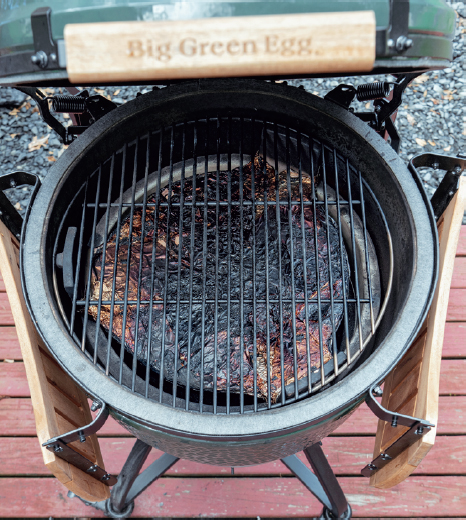
This method of indirect cooking is great for roasting and baking foods that are going to be cooked in a pan or do not drip. It is the same setup as indirect with a drip pan, minus the drip pan.
CHOOSING THE RIGHT FUEL
I recommend using natural hardwood lump charcoal in your EGG for a cleaner, hotter burn. Briquettes can be full of chemicals and produce a lot of ash. More ash means that you are burning through your fuel at a faster rate. An excessive amount of ash in a kamado-style grill will block the airflow, resulting in a drop in temperature or even a dead fire.
LIGHTING THE FIRE
Building a fire in your EGG for the first time can seem a bit intimidating, but it really is a fairly simple process. There are several methods for lighting, but whatever you do, don’t use lighter fluid! Not only will it give your food an off taste, but it can seep into the pores of the ceramic and that chemical smell will be difficult to get out of your cooker for some time.
Most people start their EGG using a torch or fire starters. I prefer to use natural charcoal starters: small, square, flat pieces of paraffin and sawdust. I break them in half so that the edges are easier to light.
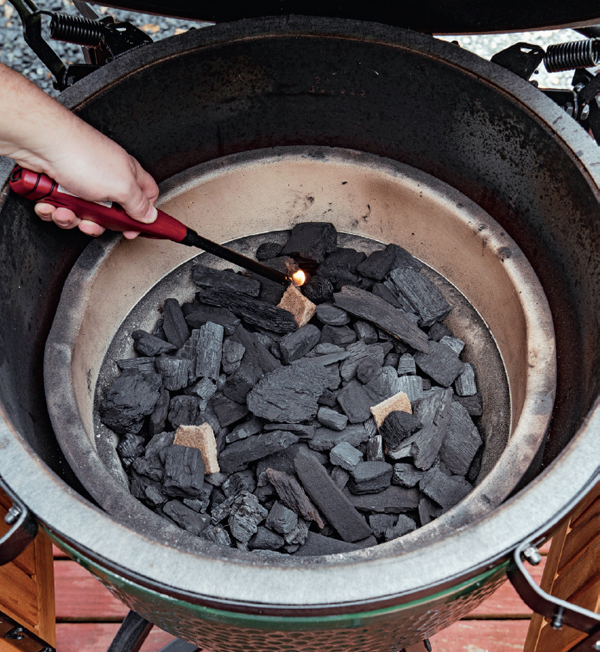
Fire Starters Being Lit
To start your EGG: Load your charcoal to the top of the firebox at the bottom of the fire ring. Place three of the starter halves in a triangular pattern, just tucking them under the lump so that they are evenly spaced, starting at the rear of the firebox. Light the fire starters, then after a few minutes, add the convEGGtor (heat diffuser), if using it, and then replace the cooking grid. At this point, the bottom draft vent and lid should be left open. After seven to ten minutes, close the bottom draft screen and the lid to the EGG, leaving the bottom draft vent and top vents wide open for a few more minutes before making any adjustments.
TEMPERATURE CONTROL
Begin working toward your desired cooking temperature. Note the temperature at the dome and adjust your vents accordingly. You may have to close the top and bottom vents up to 50 percent at this time, then make only minor adjustments as necessary. The ceramic inside of the EGG is such a great insulator that if you overshoot your target temperature, it will take some time to get it back down; therefore, you want to try to creep up on it slowly.
Using your dampers to control the airflow through your EGG will help you dial in your desired cooking temperature. If you want to raise the temperature in your EGG, add more air by opening the vents. If you want to cool the EGG down, reduce the amount of airflow to the fire by closing the vents. Give your cook temperature a chance to settle without making too many adjustments all at once.
The Big Green Egg setup instructions listed in each recipe include an approximate measure, listed as a percentage, for how wide to open your vents during cooking. Use this chart as a guide, then make adjustments to dial in your cook temperature as necessary.
| Desired Cook Temperature | Vents Open % |
| 250°F (120°C) | 10% |
| 275°F (140°C) | 15% |
| 300°F (150°C) | 20% |
| 325°F (170°C) | 25% |
| 350°F (180°C) | 30% |
| 375°F (190°C) | 35% |
| 400°F (200°C) | 40% |
| 425°F (225°C) | 50% |
| 450°F (230°C) | 60% |
| 500°F (250°C) | 65% |
| 600°F (315°C) | 75% |
If this is the first cook on your new Big Green Egg, I do not recommend cooking at a high temperature. This may damage the gasket before it can properly seal itself. Instead, light your cooker and bring the temperature up to 350°F (180°C) for three hours, to allow the gasket adhesive to fully cure and adhere to the EGG, before cooking at higher temperatures.
Calibrate your dome thermometer regularly to maintain accurate cooking temperatures. To do this, carefully take the thermometer out of the dome and, using a 7⁄16-inch (11-mm) wrench or a pair of pliers, grab the nut on the back of the dial. Place the tip of the thermometer, by at least 1 inch (2.5 cm), into boiling water and see whether it reads 212°F (100°C). If it does not, hold the dial and rotate it until it reads 212°F (100°C).
ASH MANAGEMENT
When you are done cooking, simply close the top and bottom draft vents to cut off air to the firebox and extinguish the fire. The EGG will remain hot for several hours. Allow it to cool completely before attempting to remove the ash.
When you are ready to do your next cook, remove the cooking grid and convEGGtor and set them aside. Stir the remaining coals with your ash tool, allowing the spent ash to drop to the bottom of the EGG. Insert the ash tool into the bottom vent door and scrape out the ash into a small metal ash can fitted with a lid. Reload your firebox with fresh charcoal and stir to combine it before lighting.
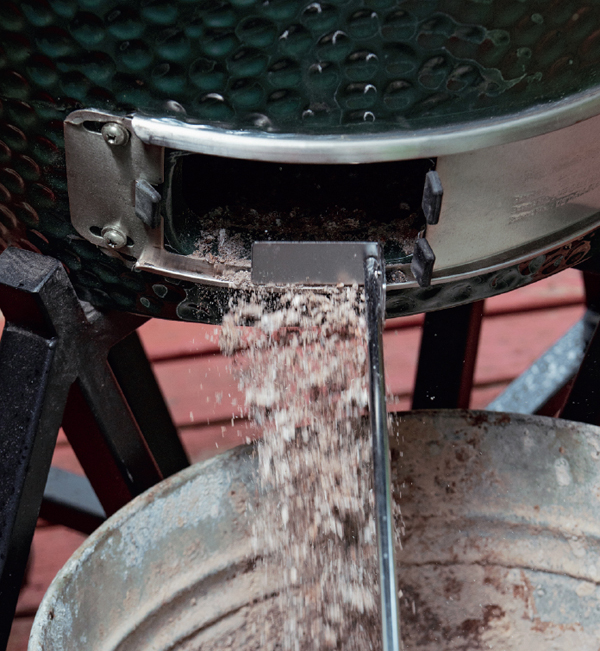
Ash Tool
SAFETY
One of the many things that people love about cooking on a charcoal grill is that they get to cook with live fire. While cooking on the EGG is not dangerous, taking simple but necessary precautions will ensure a safe and fun grilling experience.
Avoiding Backdraft/Flashback
A backdraft, or a flashback as it is sometimes referred to, happens when you quickly shut off oxygen to a hot fire, then quickly reintroduce it. Flashback is more likely to occur when you are cooking above 350°F (180°C), but can still happen at lower temperatures. This is easily managed by “burping” your EGG as you open it. To “burp” your EGG, slowly lift the dome a couple of inches (at least 5 cm) and hold it there for a few seconds, then slowly open it all the way.
Use a drip pan when smoking or roasting to prevent flare-ups. Flare-ups are essentially grease fires that happen when excessive dripping fat and the juices of cooking meat come into contact with the heat diffuser or the hot coals of your fire. Never use water to put out a grease fire. You can shut it down by closing the top and bottom vents on your cooker, thus cutting off oxygen to the fire.
MAINTAINING YOUR EGG
Nuts and Bolts of It
Periodically inspect all fasteners, nuts and bolts for tightness. The metal bands on the EGG are designed to keep the dome of your EGG secure. Check the tightness of these fittings after the first few uses, and then at least twice a year. In addition to the band and hinge hardware, all nuts and bolts should be checked regularly for proper operation and tightness.
Clean as You Go
Keeping your grill clean not only produces better-tasting food, but also helps extend its life. Never use chemical cleaners or water inside of your EGG, as they could get inside of the pores in the ceramic and leach into your food. For easy cleanup, I recommend wrapping your convEGGtor in heavy-duty aluminum foil. If your cooker is particularly dirty from your most recent cook, don’t worry. Your kamado-style cooker acts as a self-cleaning oven.
After each cook, close the lid on the EGG and let it continue to burn for about fifteen minutes. Then, using a grid tool or steel mesh brush, scrape the stainless-steel grid to remove any remaining stuck-on food particles and prevent buildup on the cooking grid.
A couple of times a year, or as needed with frequent use, you may want to raise the temperature in your EGG and do a clean burn. While it is not required, it is a good idea to give your cooker a good deep cleaning to rid it of any fat, grease or leftover debris. To deep clean your EGG, remove any leftover charcoal from your previous cook. Load the EGG with fresh charcoal to the top of the fire ring and light it. Replace the convEGGtor and stainless-steel grid. You can also put the daisy wheel on the grid to clean, if necessary. Close the lid, open the bottom vent wide and get your cooker up to 600°F (315°C) for about an hour. Close the bottom vent and allow the grill to cool completely. This may take four to five hours. With a stainless-steel brush, scrape away any residue and buildup. Use an ash tool to stir up the coals and remove the ash.
Replacing the Gasket
The heat-sealing gasket material installed on your Big Green Egg is designed to last for years under normal operating conditions. However, if the gasket shows signs of excessive wear and deterioration, or smoke is visibly seeping from where the lid and base meet, it is time to replace it. Once the cooker is completely cool, use a putty knife to scrape and remove the old gasket, as well as any grease or built-up residue. Use a rag that has been dipped in acetone to remove any of the leftover adhesive and finish cleaning before applying the new gasket. Next, light your EGG and bring the temperature up to around 350°F (180°C) for three hours to allow the gasket adhesive to fully cure and adhere to the EGG before cooking at higher temperatures.